Have you ever wanted to start your own blog, but felt overwhelmed by the process? Do you have a passion, a hobby, or a business that you want to share with the world, but don’t know where to begin?
If you answered yes to any of these questions, then this article is for you. In this article, I will show you how to start a blog in 2023, step by step, from choosing your blog topic and name to finding the right blogging platform and hosting to designing and customizing your blog, to writing and publishing your first post, to promoting your blog and making money from it.
By the end of this article, you will have everything you need to create your own successful blog, no matter what your level of experience or expertise. So, are you ready to start your blogging journey? Let’s begin!
How to Start a Blog
- Choose a blogging platform. Use templates customizable platform.
- Pick a hosting platform. Consider a platform with good bandwidth, uptime, and 24-hour customer support.
- Find the right niche. Narrow down your theme and have a specific audience in mind.
- Select a blog name and domain. Choose a descriptive name that piques readers’ interests.
- Set up and design your blog. Include imagery and effects that reflect your theme.
- Brainstorm blog topics. Write down all your ideas before narrowing down topic selections.
- Write your first blog post. Engage your audience with a killer title and use headers to make the content skimmable.
- Create an editorial calendar. Create a calendar to help you publish consistently and hold yourself accountable.
- Promote your blog. Use marketing strategies to expand your reach.
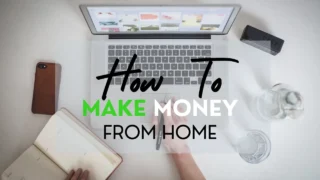
- Make money blogging. Take advantage of opportunities to monetize your blog.
1. Choose a blogging platform.
The first step to starting a blog is to find the right blogging platform. A blogging platform is the Software or service that you use to create and manage your blog. There are many options available, but some of the most popular ones are WordPress, Blogger, Medium, and Wix.
Each platform has its own advantages and disadvantages, so you should do some research and compare them before making a decision.WordPress is the most widely used blogging platform, powering over 40% of all websites on the internet.
It is free, open-source, and highly customizable. You can choose from thousands of themes and plugins to design and enhance your blog. However, WordPress also requires some technical skills and maintenance, and you need to pay for your own web hosting and domain name.
Blogger is a free and easy-to-use blogging platform owned by Google. You can create a blog in minutes and have access to Google’s features and services, such as Adsense, Analytics, and Drive. However, Blogger also has limited design and functionality options, and you have less control and ownership over your blog.
Medium is a popular online publishing platform that allows you to write and share your stories with a large and engaged audience. You can focus on your content and not worry about the design and hosting of your blog. However, Medium also has strict editorial guidelines and policies, and you have no control over the monetization and distribution of your blog.
Wix is a drag-and-drop website builder that lets you create a blog with no coding skills. You can choose from hundreds of templates and customize them with your own content and images. However, Wix also has a higher cost and lower performance than other platforms, and you have less flexibility and scalability for your blog.
Okay, let’s continue with the article. The next part is the body, where you will explain your main points and provide evidence and examples to support them. You should organize your body into sections, each with a clear subheading and a topic sentence. You should also use transitions to connect your ideas and guide your readers. Here is an example of how you can structure your body:
2. Pick a hosting Platform
The second step to starting a blog is to set up web hosting. Web hosting is the service that provides the space and resources for your blog to be accessible on the internet. You can either use a free hosting service provided by your blogging platform, or a paid hosting service that gives you more control and flexibility over your blog. Some of the best web hosting providers for bloggers are Bluehost, SiteGround, HostGator, and DreamHost.
If you choose WordPress as your blogging platform, you will need to sign up for a web hosting plan and register a domain name for your blog. A domain name is the address of your blog on the internet, such as www.yourblogname.com. You can choose any domain name that is available and relevant to your blog topic and name. You can check the availability of domain names using tools like Namecheap or GoDaddy.
To set up web hosting and domain name for your WordPress blog, you can follow these steps:
- Go to the website of your chosen web hosting provider, such as Bluehost.
- Click on the “Get Started” button and choose a hosting plan that suits your needs and budget. The basic plan is usually enough for most beginners.
- Enter your domain name in the “Create a new domain” box, or use your existing domain name if you have one.
- Fill in your account information, package information, and payment information.
- Check your email for a confirmation message and follow the instructions to set up your WordPress account and blog.
3. Find the Right Niche
The third step to starting a blog is to find the right niche Let’s get away from the technical and into something more theoretical. Consider the fundamental aspect that will serve as the cornerstone of your blog, from its URL and domain name to its content and design: your blog’s niche. What exactly do you intend for your blog to be about?
When it comes to subjects, there are essentially no restrictions. The most important thing is to choose a specific topic area that will serve as the focal point of your entire blog and content strategy.
Fashion blogs, real estate blogs, literary blogs, and food blogs are all examples of blog kinds. Because there are so many other blogs focusing on the same topics, you’ll need to find a way to stand apart while still writing about what you’re passionate about.
4. Select Blog Name & Domain
The fourth step to starting a blog is to choose your blog name and domain. Your blog name should be something that you are interested in, knowledgeable about, or want to learn more about. It should also be specific enough to attract a niche audience, but broad enough to have enough content ideas. For example, if you love traveling, you can start a travel blog, but you can also narrow it down to a specific type of travel, such as solo travel, budget travel, or adventure travel.
Your blog domain should reflect your blog name and be catchy, memorable, and easy to spell. You can use your own name, a wordplay, a pun, or a combination of words that describe your blog. For example, some popular travel blog names are Nomadic Matt, The Blonde Abroad, and The Broke Backpacker.
5. Design and customize your blog
The fifth step to starting a blog is to design and customize your blog. This is the fun part where you can make your blog look and feel the way you want. You can use the “Customize” button under the “Appearance” tab to change your theme’s settings, or you can use plugins or extensions to add more features and functionality to your blog. Plugins are software components that extend the capabilities of your WordPress blog, such as SEO, social media, analytics, security, and backup. You can browse and install plugins by clicking on the “Plugins” tab on the left sidebar and then on the “Add New” subtab. Some of the essential plugins for bloggers are:
- Yoast SEO: This plugin helps you optimize your blog for search engines, by providing you with tools and suggestions to improve your content, keywords, titles, meta descriptions, and more.
- Jetpack: This plugin provides you with a suite of features and services, such as site stats, social sharing, contact forms, spam protection, backups, and more.
- Akismet: This plugin helps you combat spam comments and trackbacks, by automatically filtering and deleting them.
- WPForms: This plugin helps you create and manage forms on your blog, such as contact forms, feedback forms, surveys, polls, and more.
- Elementor: This plugin helps you create and edit beautiful and responsive web pages, by using a drag-and-drop interface and a variety of widgets and templates.
06. Brainstorm blog topics
On the technical side, your blog is now set up and ready to go. It’s time to start thinking about which topics you’ll get started with.
Begin by thinking about your experiences, successes, failures, or discoveries related to your niche. What insights can you share? What ideas are you looking to explore in-depth?
As you think of topics, try to get into your readers’ heads. Here are some questions to guide you through the brainstorming process:
6. Write and publish your first post
The sixth step to starting a blog is to write and publish your first post. You should write about something that you are passionate about, that provides value to your readers, and that showcases your personality and voice. You should also use headings, subheadings, bullet points, images, videos, and links to make your post more engaging and readable. Don’t forget to proofread and edit your post before hitting the publish button.
To write and publish your first post, you can follow these steps:
- Click on the “Posts” tab on the left sidebar and then on the “Add New” subtab.
- Enter your post title in the “Enter title here” box. Your post title should be catchy, clear, and relevant to your post content and keywords.
- Enter your post content in the “Start writing or type / to choose a block” box. You can use the block editor to add different types of content, such as paragraphs, headings, lists, images, videos, quotes, and more. You can also use the classic editor to write your post in a single text area.
- Add a featured image to your post by clicking on the “Featured Image” tab on the right sidebar and then on the “Set featured image” button. A featured image is the main image that represents your post and appears on your blog homepage and in social media shares.
- Add categories and tags to your post by clicking on the “Categories” and “Tags” tabs on the right sidebar. Categories and tags are ways to organize and label your posts based on their topics and keywords.